Refit: Norsand Boatyard, Whangarei, New Zealand - November 2012 to April 2013
Slip Away's "Ten-Year Tune-Up"
Shortly after we started cruising, we met Larry Schick (s.v. Moira) who told us about his theory of boat work being like a box of luck. When you work on the boat, you are adding luck to the box. When you’re out cruising and having fun, you are withdrawing luck from the box. It’s important to put more luck in the box than you take out. We've put a lot into our box of luck since owning Slip Away, but we've taken a lot out too.
By now, we'd been living on Slip Away almost eleven years and cruising her for close to ten years, covering over 28,000 nautical miles. During this time, we've kept a running "to-do" list, continually adding and crossing off items. Although we crossed off a fair number of items, that "to-do" list never seemed to get any shorter - it just kept getting longer. It was time to build up that box of luck again and tackle the "to-do" list, which included a few big projects and lots of small ones, regular maintenance items, some repairs and a few modifications and upgrades. Slip Away was in need of a "ten-year tune-up."
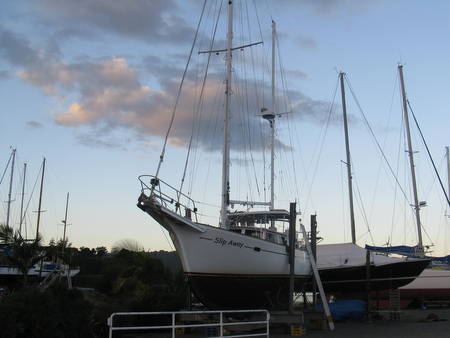
When we flew back to New Zealand from the USA in November 2012, Slip Away was waiting for us at Norsand Boatyard, so we were all set to get started. Over the next four months, we lived "on the hard" and plugged away at our list. We did a fair amount of the boat work ourselves, but we also got help from the boatyard and some other local vendors on a number of items.
During this haul-out, we wanted to be as efficient and productive as possible, so we established a routine of sitting down once a week (usually on Sunday) to review our overall project list, and then setting our priorities for the coming week. This system worked well for us, and we started seeing results right away. It also helped to keep us from feeling overwhelmed by our long to-do list, and make sure something didn't slip through the cracks.
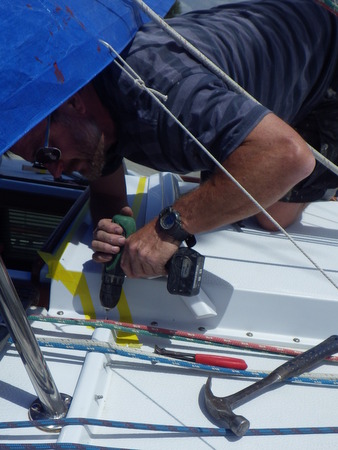
Slip Away at Norsand BoatyardBoat chores often get divided into "blue jobs" and "pink jobs". When we are in the boatyard, since Rich has good mechanical skills, he takes on the role as "chief engineer", either handling a project himself or coordinating the work with an outside vendor. Jan helps Rich as needed (she's quite good at holding a wrench or fetching tools), but she also manages her own painting, varnishing and sewing projects, handles paperwork, pays the bills, sources parts and runs errands. Most importantly, she makes sure our basic needs are met, i.e., food, beer and laundry.
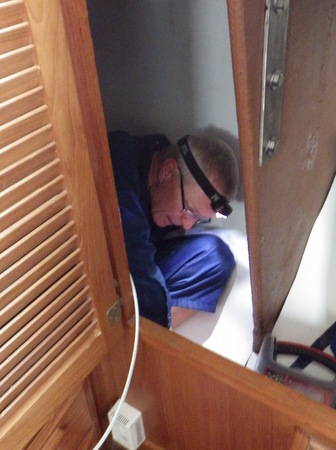
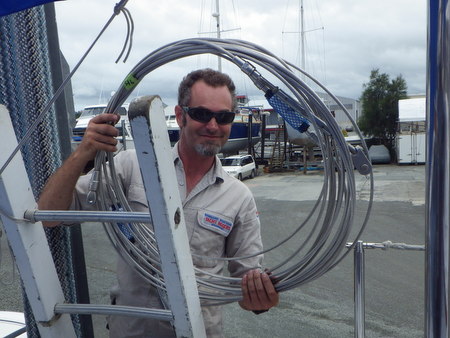
Rich is not only good at mechanical and electrical repairs
but he's also able to fit into tight spaces!
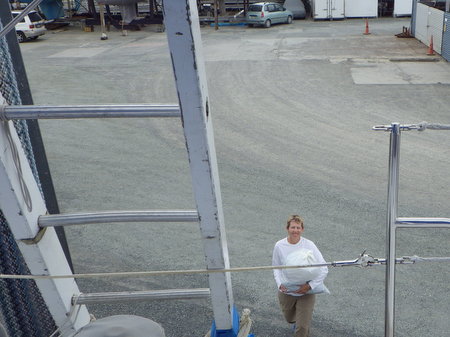
Jan returning to Slip Away with a bag of clean laundryWe were extremely pleased with the quality of work we had done at Norsand Boatyard, and they have a great staff - genuinely nice people who work hard and want their customers to be happy. The Yard Manager, Peter Palmer, did an excellent job of managing our projects, and the staff was well trained and had great ideas for solving problems/issues. If we wanted to do a job ourselves but needed some advice, they were happy to provide it. Our timing of being in the boatyard early in the season was quite good. NZ boatyards get quite busy with overseas cruising boats in February and March, and their workers are stretched trying to serve everyone. Although Norsand was busy with local boats in December, we found November and January to be less hectic.
In addition to the Norsand staff, we utilized the services of a number of other local vendors (e.g. Absolute Stainless), and again we were very happy with their work. New Zealand is not the cheapest place in the world to get boat work done, but we generally found their labor rates to be fair (definitely less than the USA), and the quality of work is top notch. Buying parts and other boat-related items in NZ can be very expensive, but we were aware of that from our previous visit and tried to bring as much of that stuff as we could in our luggage from the USA. (One guy who was in the boatyard at the same time as us had a pallet of stuff shipped to him from the U.S.)
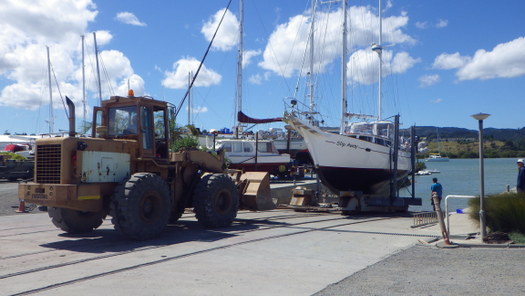
We were hoping to spend three months working on Slip Away in the yard, but as usually happens with boat work, it took longer than anticipated and we spent four. Slip Away went back in the water on March 7, 2013. We wish we could say that we crossed everything on our list, but unfortunately that did not happen. However, we accomplished a lot, and our "to-do" list is now much, much shorter. This was definitely the most productive haul-out we’d ever had. When Slip Away was launched, we felt she was probably in the best shape she’s ever been in, and she looked beautiful too.
Of course, once Slip Away was back in the water, we had a few unanticipated repairs to make. Actually, we expected there would be some things that would not work, we just didn't know which things they would be! From Norsand Boatyard, we went into the Town Basin Marina, where we spent three weeks sorting out a problem with the genset which wouldn't start (needed a new run solenoid and new glow plugs) and wrapping up some other loose ends. After Town Basin, we headed out for a sea trial and a week at Great Barrier Island (a much-needed break!). After our short respite, we pulled into Marsden Cove Marina, and spent our last month in New Zealand resolving a few other issues that came up (e.g. burst high-pressure hose on the watermaker) and wrapping up the "must do" items. At the end of April, we sailed away from New Zealand, heading north to Fiji.
Back in the water after ten months on hardstandHere are some of the projects we completed in New Zealand:
Rigging: We replaced all of the standing rigging on Slip Away in 2002 just after we bought her, but it was time to do it again. Gerry Jacobs (Norsand's on-staff rigger) was in charge of most of this project, and Rich assisted him. We found Gerry's work to be top-notch, although he sometimes needed help with schedule management. Absolute Stainless did fabrication and polishing work.
Removed and serviced both headsail and staysail furlers.
Installed new wire on headstay, staysail stay and triatic.
Replaced standing rigging on main mast with new wire and Norseman fittings. (Wire on mizzen was replaced in 2008.)
Replaced upper and lower tangs, bolts and compression sleeves on both main and mizzen.
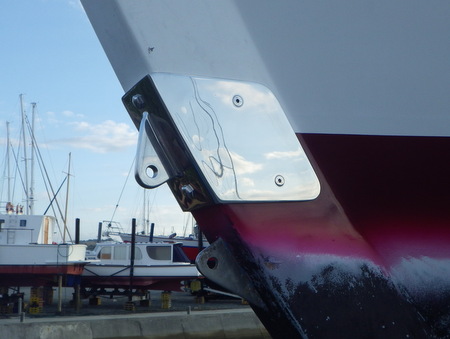
Fabricated and installed new bobstay base and replaced bobstay wire.
Fabricated and installed a new boom gallows/mainsheet traveler support- new shape eliminates mainsheet interference with cockpit roof.
Repaired spinnaker pole (end fitting had come loose and was partially pulled out).
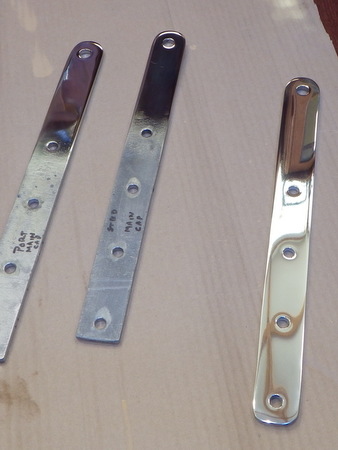
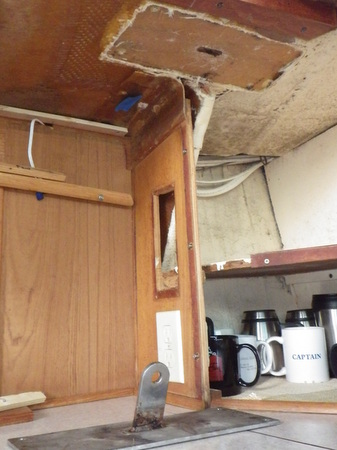
Replaced final original chainplate, which involved removing and reinstalling a galley cabinet.
Removed all chainplates made in American Samoa in 2011, had them polished, and reinstalled.
Fabricated new lifeline gates.
Installed new spreader boots.
Inspected and lubed goosenecks.
Gerry Jacobs, Norsand's Rigger,
arriving with new wire and fittings for main mast
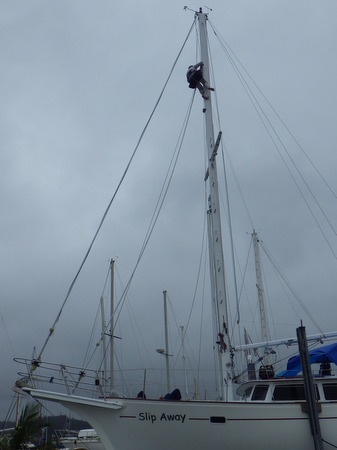
Gerry at work on Slip Away
New bobstay base installed above the old one
Polished chainplates
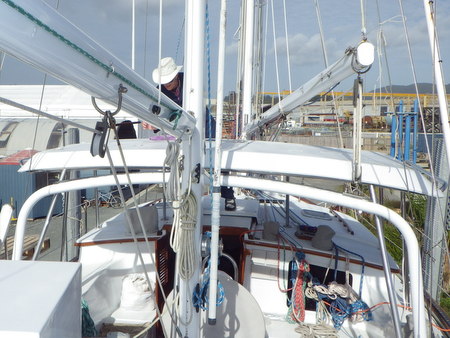
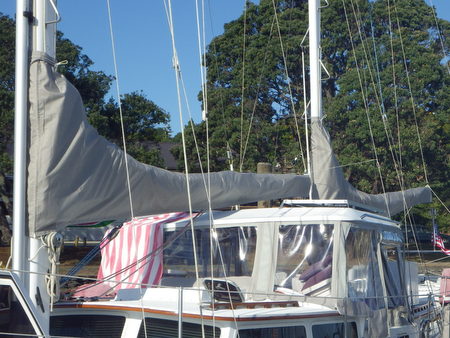
Old boom gallows/mainsheet traveler
With the new boom gallows/mainsheet traveler,
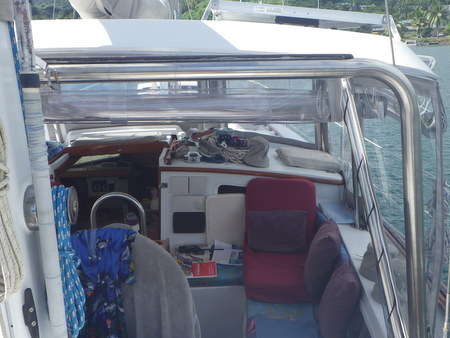
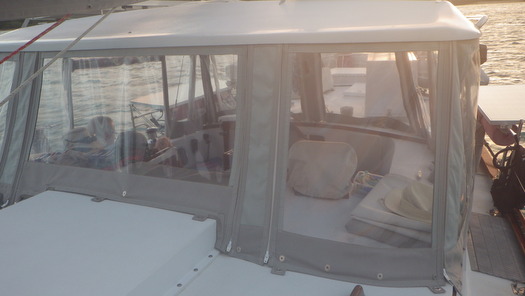
the mainsheet blocks no longer bang against the cockpit roofCockpit Enclosure: We love our cockpit hardtop, but the Sunbrella® and Strataglass® cockpit enclosure was the one project that we did in Cartagena, Colombia, that did not go well. First, we got a couple of bad recommendations from Sailrite on the awning track (a plastic one which started to rip shortly after installation) and zippers (Riri brand, several of which failed in the first few months). Then, the best canvas guy in Cartagena was not available to do our work, so we ended up with the second best (second best by a large margin). The fit and finish work left a lot to be desired, and to top it off, the canvas guy sewed a non-UV rated trim on all the pieces, and this trim was rotting away in the sun. This was one of our big jobs which required coordination of vendors and took some time to complete, but we were very happy with the end result.
To fix the awning track problem, we had to remove the cockpit roof, and Norsand helped us with that. Once the roof was off the boat, Rich removed the plastic awning track and filled the screw holes, Norsand painted over the hole repairs and Absolute Stainless fit a new aluminum track. This project continued to be snake bit when Absolute Stainless sent the aluminum track to Auckland to be anodized, and it was damaged in shipment on the way back to us. Fortunately, they were able to repair the damage and didn't have to start over.
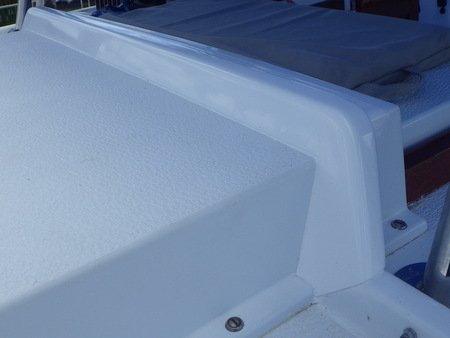
While the new awning track was being fitted, we worked with Steve Eichler of Norsand on a couple of modifications to the front and side of the cockpit to reduce water intrusion in driving rain or rough seas. Steve designed and built a small "bridge" across the front and center of the cockpit (on top of the companionway hatchbox) and fitted a couple of small "dams" on each side of the cockpit to fill in voids where the water came in. He made these pieces out of wood, fiberglassed over them and then painted them white. Steve is an incredibly talented shipwright, and these additions look like they are part of the boat. Best of all, they're keeping the water out!
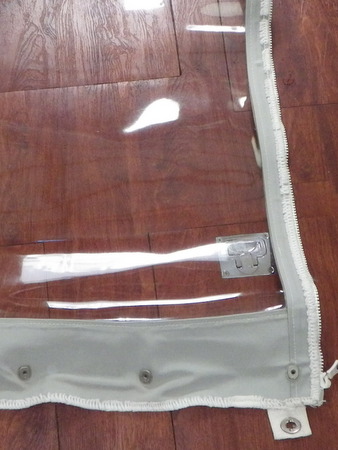
Concurrently, Jan spent a couple of days removing all the sun-deteriorated trim from the cockpit enclosure pieces. Once the cockpit roof was reinstalled, Colleen from Colleen's Canvas got to work refitting our existing cockpit enclosure pieces. She replaced the bottom section on each piece to accommodate the modifications we made to the front and sides of the cockpit and to ensure a proper fit with all attachment points. She also completely re-made the aft corner curtains (a better design to keep out the rain), sewed new Sunbrella (UV-resistant) trim on all the pieces and installed new YKK zippers.
The old plastic awning track was barely hanging on.
We had used some strips of aluminum as "band-aids."
The old trim, which started rotting away
after only a few months
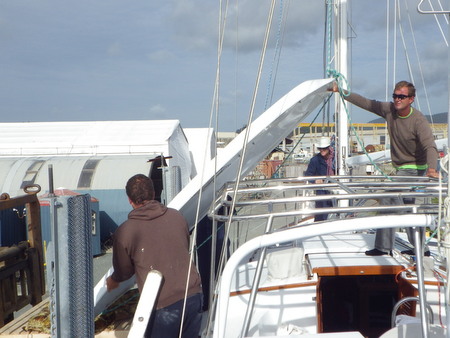
Clayton (left) and Peter (right) from Norsand
helping us to remove the cockpit roof
Steve Eichler at work on the cockpit modifications
The new "bridge" across the center front of the cockpit
The new "dam" on the starboard side of the cockpit
New aluminum awning track
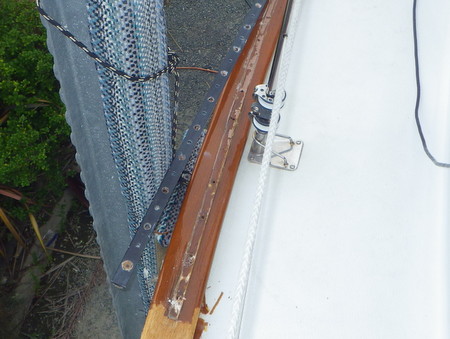
Cockpit roof reinstalled, and re-fitted enclosure pieces with new trim and zippersCaprail: This was a another big job - and we did it all ourselves. This was another one of those projects which we did ten years ago, and it needed to be done again. After ten years and a lot of use, we had a few leaks.
Removed the sail track and all caprail hardware (chocks, dinghy davit bases, etc.)
Used a heat gun to strip all the varnish (Honey Teak) off the caprail, then sanded and prepped it to re-varnish.
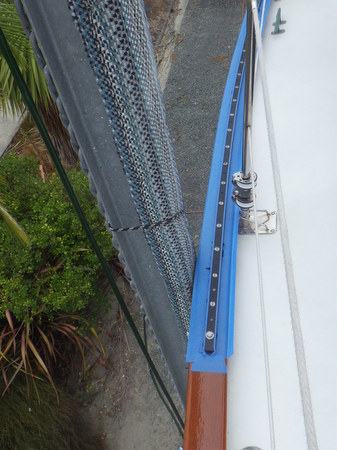
Varnished with Honey Teak (4 coats of honey and 4 coats of clear, applied two coats per day)
Re-bedded the sail track and all caprail hardware.
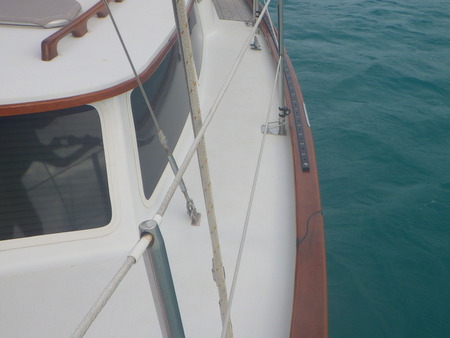
Re-sealed both inside and outside edges of the caprail (where it meets the fiberglass).
No more leaks!
Stripping the caprail to bare wood and removing the sail track
Caprail with new varnish - re-bedding the sailtrack
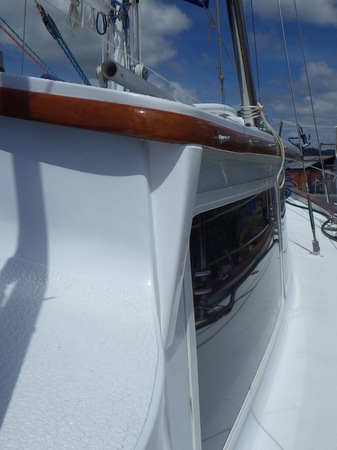
Finished cap rail job, as well as
new varnish on cabintop trim and maintenance coats on handrailHull and Bottom:
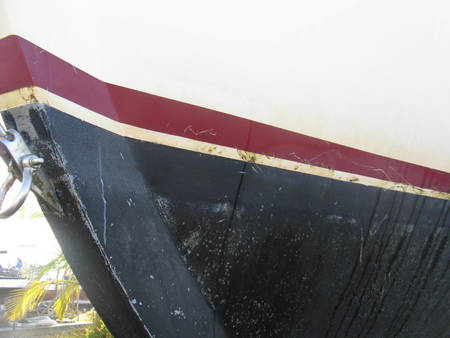
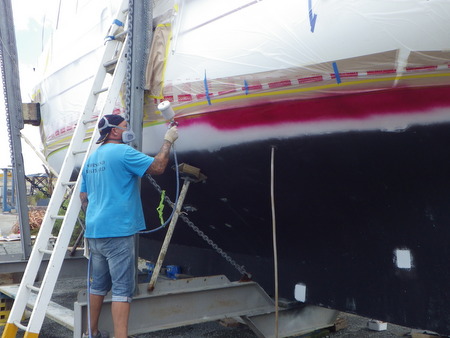
We had some air bubbles in the gelcoat at the waterline and some scratches in our bootstripe, so Norsand's painter, David repaired and repainted all of that. We eliminated the thin white stripe between the bootstripe and bottom paint and raised the bottom paint up to the lower edge of the bootstripe. It cost less to do it that way and will be easier to keep clean, and we like the look.
Norsand repaired a few blisters on the bottom and repainted the bottom with Jotun Seaforce 90 bottom paint.
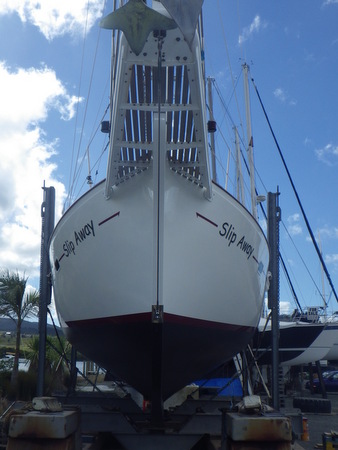
Rich spent a couple of days with Jason from Norsand Boatyard buffing and sealing the hull with A-Glaze Surface Sealant. Slip Away was so shiny that another boat owner went to the boatyard manager and complained that our boat was shinier than his!
Scratched up bootstripe needing repair, bottom needing new paint, and the
white strip between the bootstripe and bottom paint was hard to keep clean
David, Norsand's painter, spraying on the new bootstripe
Hull shined up with A-Glaze, repainted bootstripe,
new bottom paint, and the white strip eliminated.Interior:
Steve Eichler of Norsand helped us with a number of small interior woodworking projects, e.g. filling holes which resulted when we removed equipment we no longer used (e.g. air conditioner/heat pump). He also designed and installed teak locking latches on our galley cabinets and drawers to prevent them from opening in rough seas - a simple design that looks nice too, and much better than our bungee cord method!
Varnished new interior wood and re-varnished portions of the galley and other interior areas which were showing wear.
Re-painted the aft head, as well as the interiors of several cabinet/stowage areas.
Continued work on replacing all of our plumbing lines and connections with Whale tubing and fittings - a project started 10 years ago. We have only one more line to replace (hot and cold water lines to the front head sink).
Installed a new shower head and water mixer.
Installed a fresh-water foot pump in the galley.
Installed a new faucet in the galley, rebedded the sink and replaced the drains.
Replaced all sanitation hose on aft head.
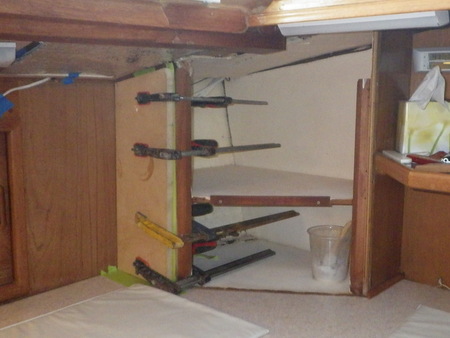
Replacing the last chainplate required
removing part of one galley cabinet
Gluing teak veneer over a hole which used to hold the control display
from an air conditioning system which we removed
All pieces reinstalled and newly varnished,
and a new latch on the cabinet door to keep it from opening when underway
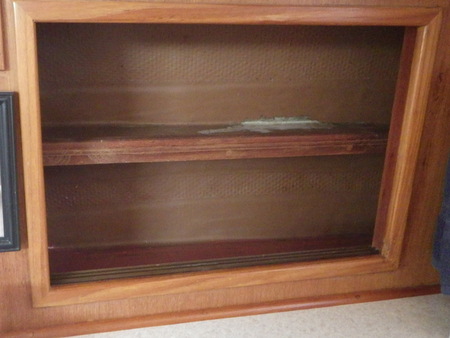
Stateroom vanity cabinet with the original brown paint inside
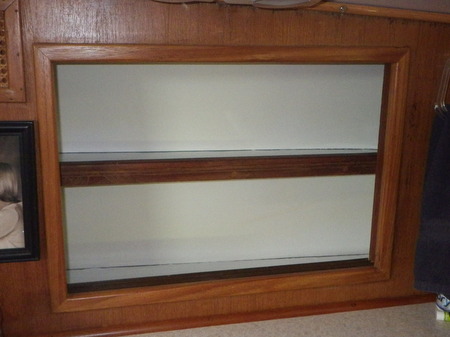
Stateroom vanity cabinet much brighter with white paint
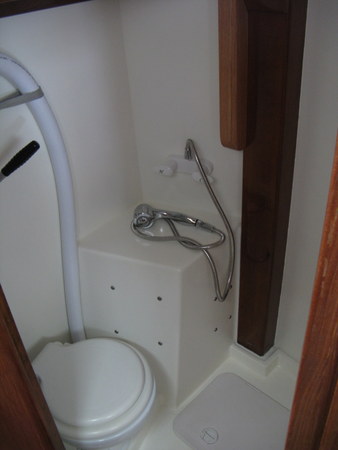
Stateroom head with a new coat of paint,
new shower mixer, new shower head and new head hosesDinghy & Outboard:
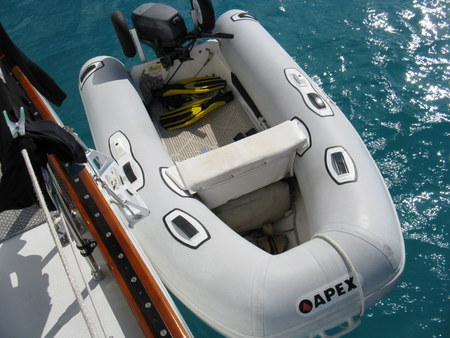
Tim at Northland Inflatables installed two new handholds at the front of the dinghy (so Jan has something to hold on to when Rich feels the need for speed!), as well as straps to hold our oars along the tubes on the inside of dinghy. How nice to no longer have the oars under our feet when we climb into the dinghy!
Rich installed gas tank brackets to keep the gas tank (and weight) forward in the dinghy.
Hayden at Outboard Pro serviced our outboard (a Yamaha 15 hp, now 8 years old). He cleaned the carburetor, replaced the impeller and spark plugs and did some other tune-up items, and it's running better than ever.
Ground Tackle:
Absolute Stainless reinforced the anchor trough on our primary anchor.
Avon Industries re-galvanized primary anchor (66 lb Bruce) and chain (3/8" proof coil).
Absolute Stainless installed a tube under windlass to divert chain and prevent fouling in anchor locker. The chain fouling problem developed after installing a new windlass in Cartagena. The chain fouls less now, but the problem hasn't completely gone away.
Installed a piece of starboard on the caprail to protect it where the chain passes over it.
Rebuilt the anchor snubber with new line and hardware.
Installed new flush-mount saltwater washdown fitting (so that the headsail sheets would not catch on it).
Dinghy with new handles on the front,
straps to hold the oars along the inner sides of the tubes,
and new brackets holding the gas tank in place under the seat
Rusty anchor chain in need of re-galvanizing
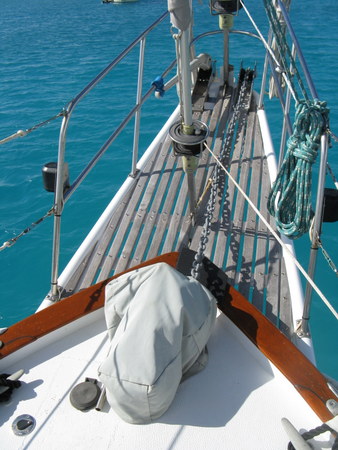
Foredeck with re-galvanized anchor chain, black Starboard
protecting the caprail under the chain, reinforced primary
anchor trough, and the flush-mount
washdown fitting (lower left)
Engine & Genset: Peter Palmer (Norsand's boatyard manager) referred us to Tim Brown of Sunny Marine to help us with some repair and maintenance work on our engine and genset. Tim is an outstanding mechanic, and a super nice guy!
Northern Lights Genset: replaced run solenoid, glow plugs, engine mounts and control box shock mounts.
Yanmar Main Engine: Rebuilt both alternators, changed raw water impeller, relocated raw water and fuel hoses, aligned engine.
Tim also helped us gather some miscellaneous parts and provided advice to install our Algae-x fuel polishing system (which is still under construction).
Prop & Steering Gear:
Rich and Gerry Jacobs (Norsand's rigger) worked together to replace the steering cables.
Whangarei Engineering replaced our cutlass bearing and removed our prop shaft, cleaned it and checked it to make sure it was still straight (and it was).
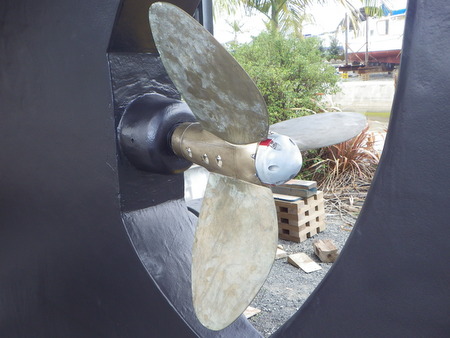
Replaced collar and bellows on PYI shaft seal, and reduced the pitch on our Max Prop by a notch.
Sails:
Waldo and Tom of Calibre Sails inspected all of our sails, re-stitched and repaired as needed (no major holes or tears, but a few minor ones) and sewed new Sunbrella sun covers on the headsail and staysail. Additionally, they were kind enough to store our sails for us until Slip Away was back in the water.
Once we were floating again and reinstalled the sails, Jan sewed new sail covers for both the main and mizzen.
Repitched Max-Prop with new zinc
New sail coversMiscellaneous:
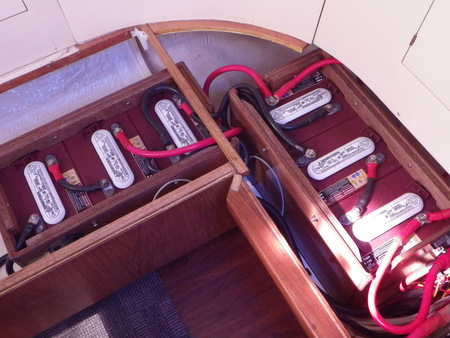
Replaced Lifeline AGM batteries with Trojan AT125 wet cell batteries (purchased from Alco Batteries in Auckland). We had converted from wet cells to AGM's in 2008 and were not happy with their performance, so we went back to wet cells. Steve Eichler of Norsand built battery boxes to accommodate the wet cell batteries.
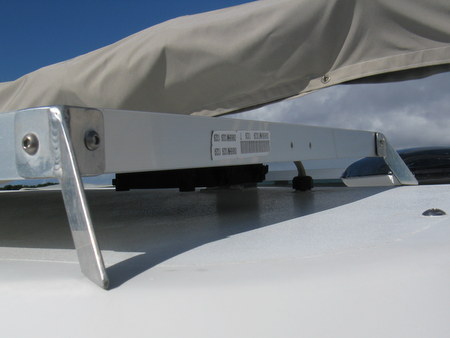
Absolute Stainless fabricated and installed guards on the corners of our solar panels to prevent the mainsheet from catching on them.
Re-routed the cockpit roof solar panel wiring through the roof.
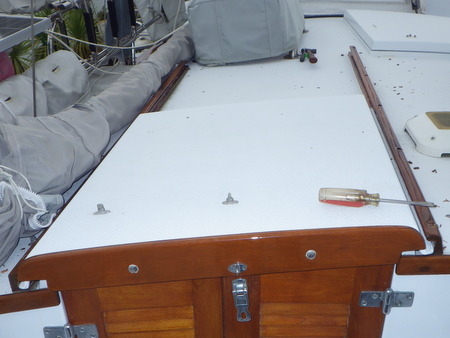
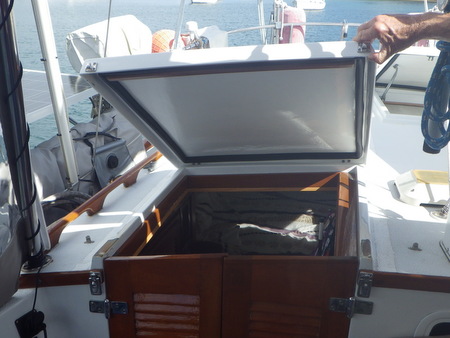
Steve Eichler of Norsand helped us to convert our aft cockpit hatch from a sliding hatch to a lifting hatch.
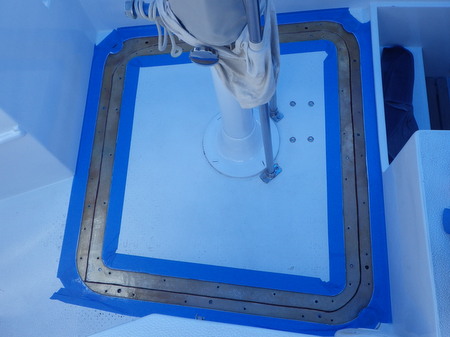
Rich and Steve Eichler worked together to countersink the stainless ring in our cockpit floor (which fits around the opening through which our new engine and genset were installed into the engine room). Jan assisted Rich with re-sealing the ring.
Steve Eichler repaired some dry rot in v-berth and cockpit locker.
Stripped cabintop teak trim pieces to bare wood and re-varnished. Applied maintenance coats of Honey Teak on teak handrails.
Replaced wire and hardware on flopper stoppers (Magma Rock n Roll)
Installed new watermaker membrane, replaced defective gauges and replaced high-pressure hoses.
Replaced engine room vent cover on side of cockpit coaming.
Sewed new jerry jug covers, and cabintop hatch covers.
Murray Reid performed and provided a new insurance survey for us.
Scott from Empower Electric helped us with the installation of an AIS receiver.
Wilco Marine in Auckland serviced and re-certified our life raft.
Dive HQ in Whangarei serviced our scuba gear - BC's and regulators
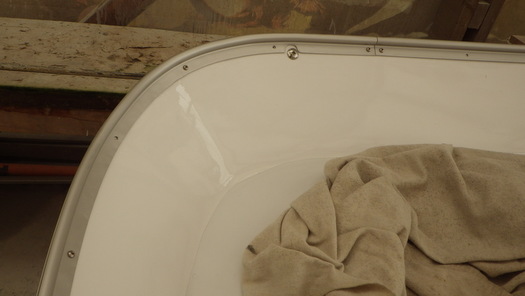
Pete from Metro Glasstech fabricated a new window for our front hatch, as well as a lexan insert for our aft cockpit doors to prevent water intrusion should we take a big wave in the cockpit.
Rented a Rug Doctor, which we used to clean our area rugs and settee cushions.
Lots and lots of stainless polishing and other cleaning and polishing on the boat.
We've probably forgotten a few things, but that covers most of it!
The old aft cockpit hatch design - slide to open
The new aft cockpit hatch design - lift to open
Guards on the edges of the solar panels to prevent the mainsheet from
catching on them, and a through-deck fitting for the solar panel wire
Countersinking the cockpit ring
New Trojan wet-cell batteries in new battery boxes